Sous Vide, ‘Under Pressure’ in French, is the biggest revolution in cooking in the last fifty years. It involves sealing food inside a plastic bag and placing it in a water bath, kept at a precise temperature, for a prolonged period of time. It’s being used by chefs from Heston Blumenthal to Thomas Keller, Gordon Ramsay to Wylie Dufresne and cuisines from Asian to Molecular Gastronomy. But why?
Because ‘Sous Vide’ is so precise, there is no risk of overcooking. Food is the perfect temperature. Because the bags are sealed, nothing can escape and the flavour molecules can’t dissovle in anything, creating a very intense flavour. Slow cooking ensures that complex protein molecules break down slowly, creating incredibly tender meat and fish. A final benefit is that of convenience, the food can be cooked in advance, stored in it’s airtight bag and reheated as needed.
So why isn’t everyone doing it? There are a number of downsides. One of the major barriers is that people just aren’t familiar with it. My Mum was horrified at the idea of cooking meat at ‘low’ temperatures. Due to the chefs that use it, it’s also seen as complicated or difficult. Another issue is that of caramelisation. Because the food doesn’t get hot enough to allow ‘Maillard Reactions’ (that lovely browning you get on meat) to happen, everything ends up looking rather pale – this can be overcome with the judicious application of a blowtorch or red hot pan. Perhaps the biggest problem though is price – a typical domestic Sous Vide machine will cost around £500 and you’ll also need to buy a vacuum sealer and bags (around £100+)
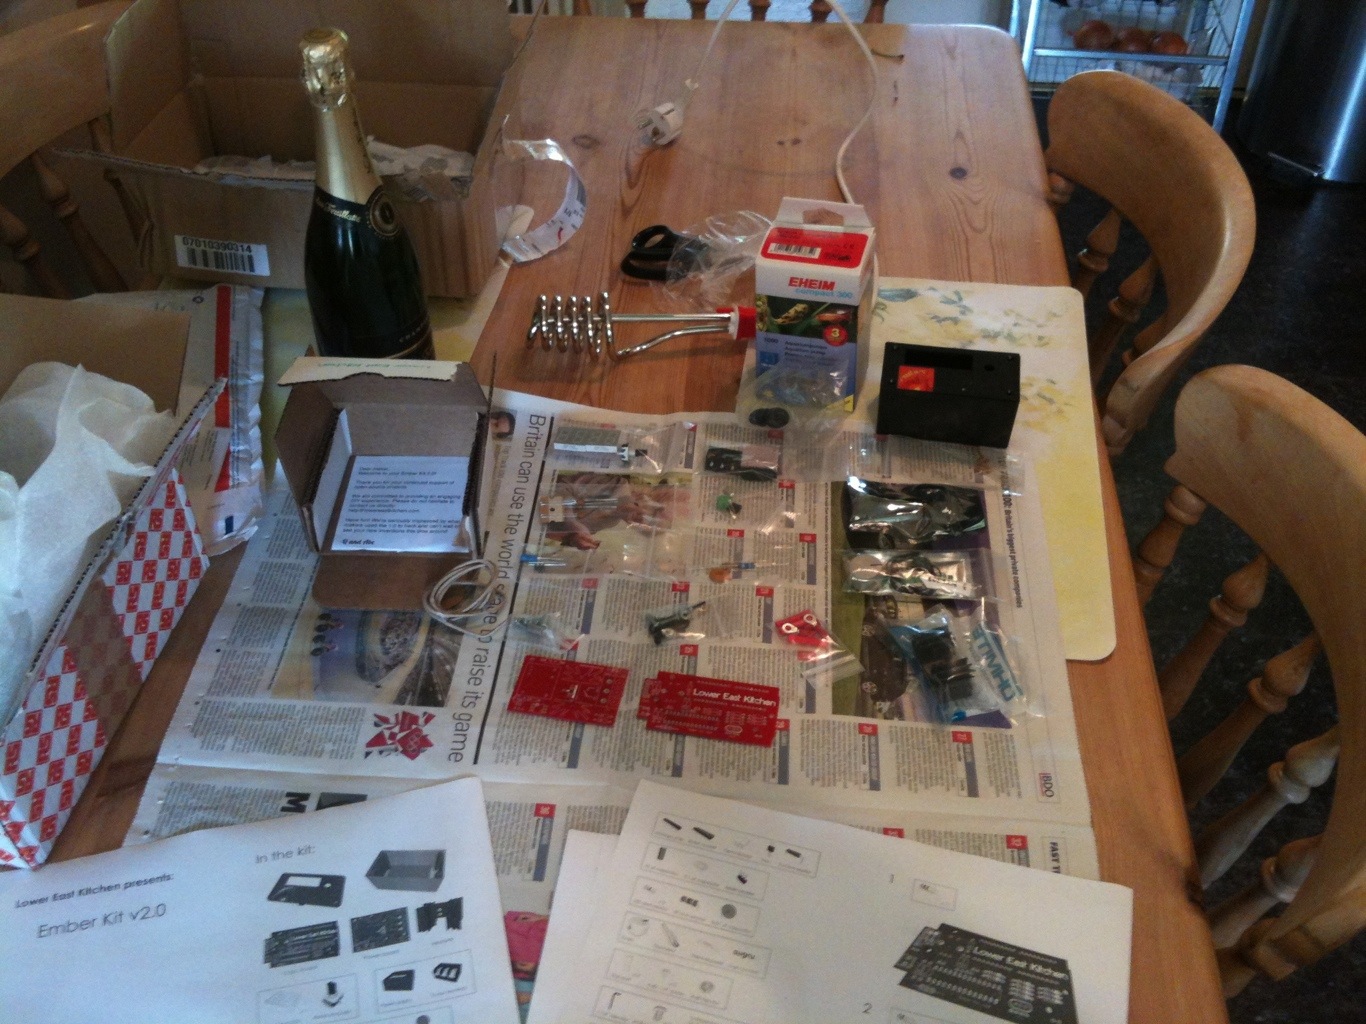
Keen to get involved in the Sous Vide craze, but unable to afford a proper machine, I decided to follow many other amateur chefs and build my own – time to break out the soldering iron!
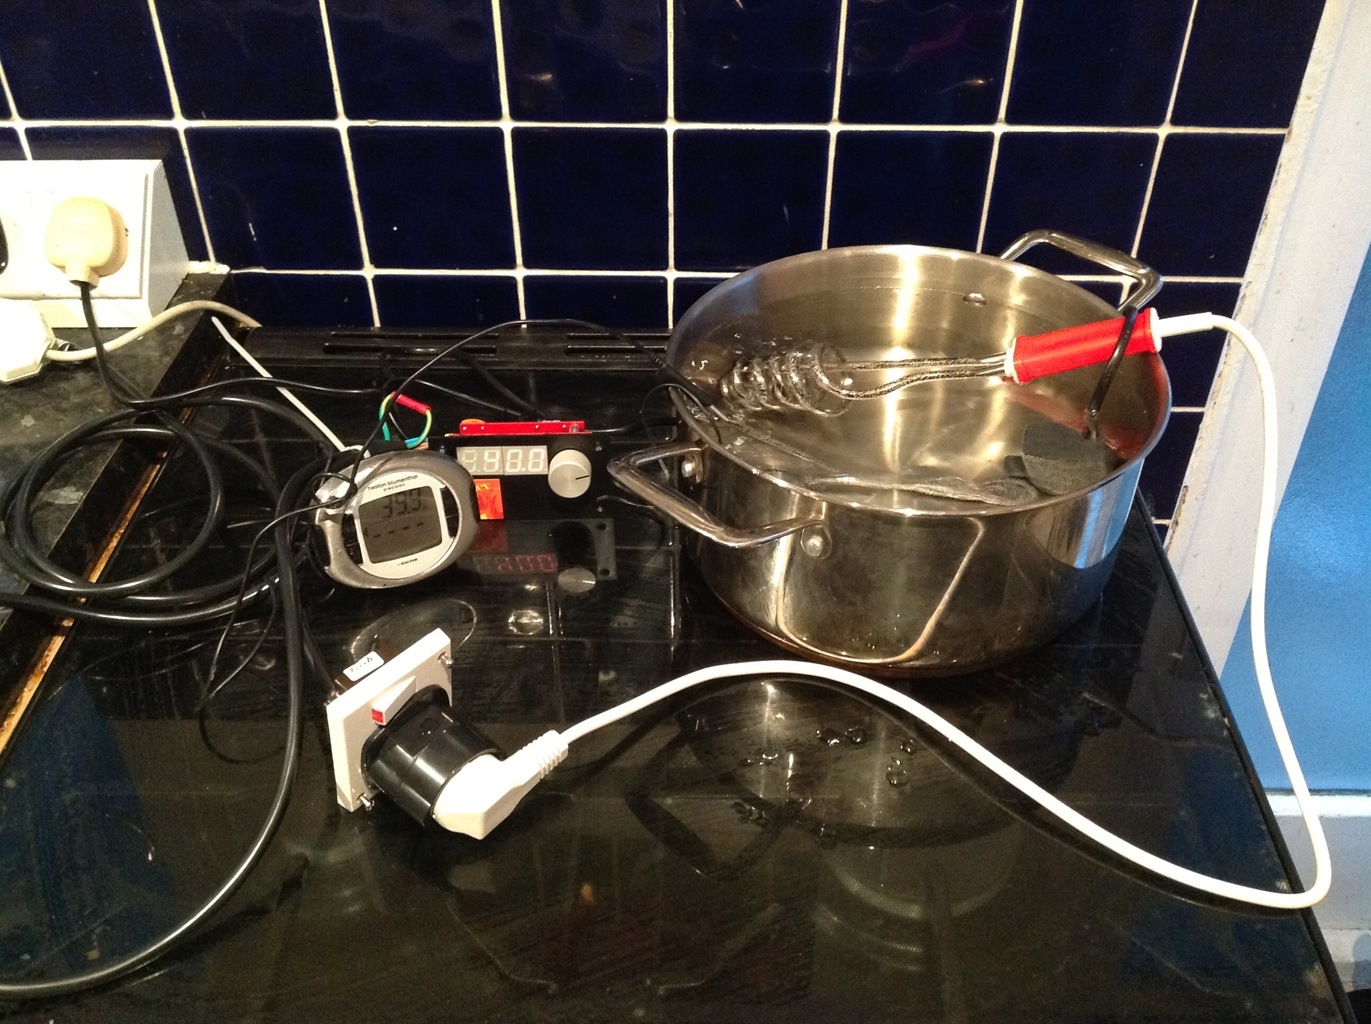
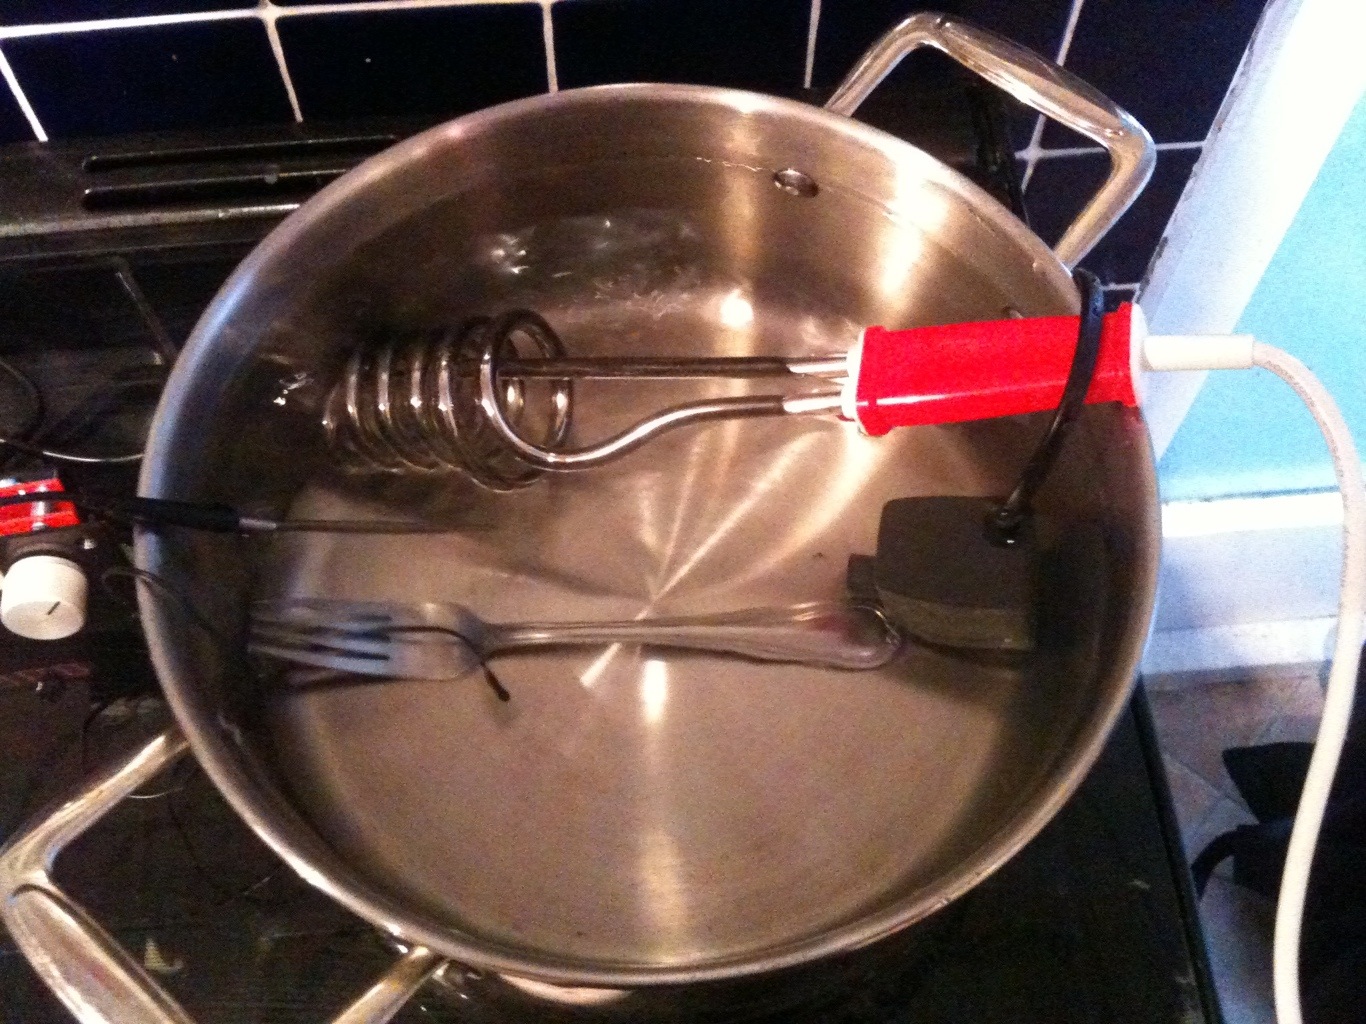
A sous vide machine is deceptively simple. You need a vessel to hold the water, a way of heating it, moving it around to ensure it’s an even temperature, measuring that temperature, and controlling it. The actual ‘control logic’ is a little more complicated and requires some clever PID tuning. Rather than start from scratch I bought an ‘Ember Kit v2’ from the lovely people at Lower East Kitchen which provides almost everything you need. You just have to assemble the kit and supply a reservoir and a method of heating it (coffee urns are very popular). I’m deviating slightly due to the fact that my kitchen is tiny, so an ‘immersion circulator’ solution makes more sense while I iron out the kinks. The next generation of the ‘Ember’ is currently sitting on Kickstarter, if you’re interested in an affordable sous vide solution, but don’t fancy the DIY route – give the Nomiku a look!
An exciting package duly arrived from America, complete with all the components neatly bagged up. I downloaded the instructions, setup my soldering iron, and set too. If you have any experience of electronics, it’s very easy to follow and the end result looks great. The board is beautifully made, with all the values printed on it to make component placement easy. The ‘multi-layer’ design means that there’s little risk of scratching an all important track. The instructions were easy to follow, and the only error was due to my own incompetence (soldering the screen on the wrong side) a quick order to Farnell and, for a few pence, the replacement screens arrived the next day, along with the socket and power cable I was going to use.
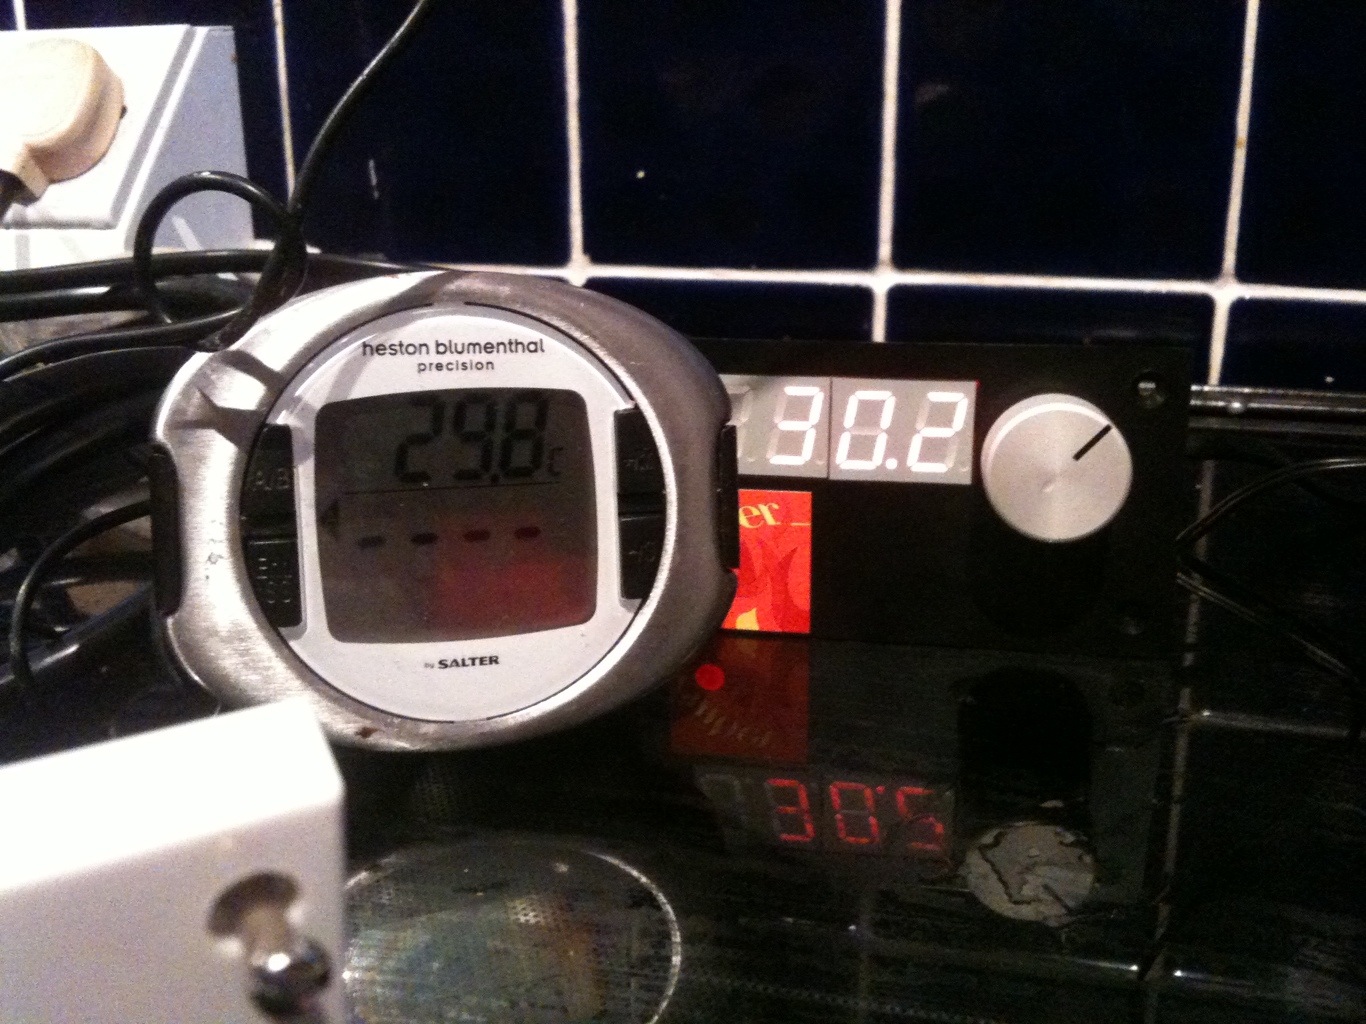
On a rainy Monday evening I finally put it all together and gave it the first ‘test drive’. The system worked beautifully – the water heated to temperature within a few minutes and the Ember Kit held it at the correct temperature with a scary accuracy – over half an hour it never wavered more than 0.1C from the target.
This weekend i’ll be putting the kit through it’s paces, cooking a variety of established dishes, as well as trying out a few of my own. I’ll be posting the full details of my Sous Vide setup shortly in another post – more soon!