
Making your own beer is easy and fun. I started out with the simplest form – extract kits. Everything you need is contained in two handy tin cans which you simply dilute, add yeast and leave to ferment. There’s no real skill involved, provided you can keep things clean. I’ve also tried some more complicated recipes where you get to handle the hops, like Obama’s beer. I’ve never been brave enough to attempt a real ‘brew’ though, making beer the traditional way. But what better time to get out of my culinary comfort zone than the new year? I cracked open my Brooklyn Brewing Company Everyday IPA kit and got started.
The Ingredients
Beer, at it’s heart is very simple – water, malted barley, hops and yeast. You use the water to extract the sugar from the barley, flavour it with hops and ferment it with yeast. Sadly, the reality is a little more complicated. The brewing jargon is wonderful though, so it’s worth battling through.
The Mash
The first stage is to carefully cook the sugars out of the grain – this involves holding a grain/water mixture at around 65C for an hour with the occasional stir. You then raise the temperature to about 77C and ‘mash out’.
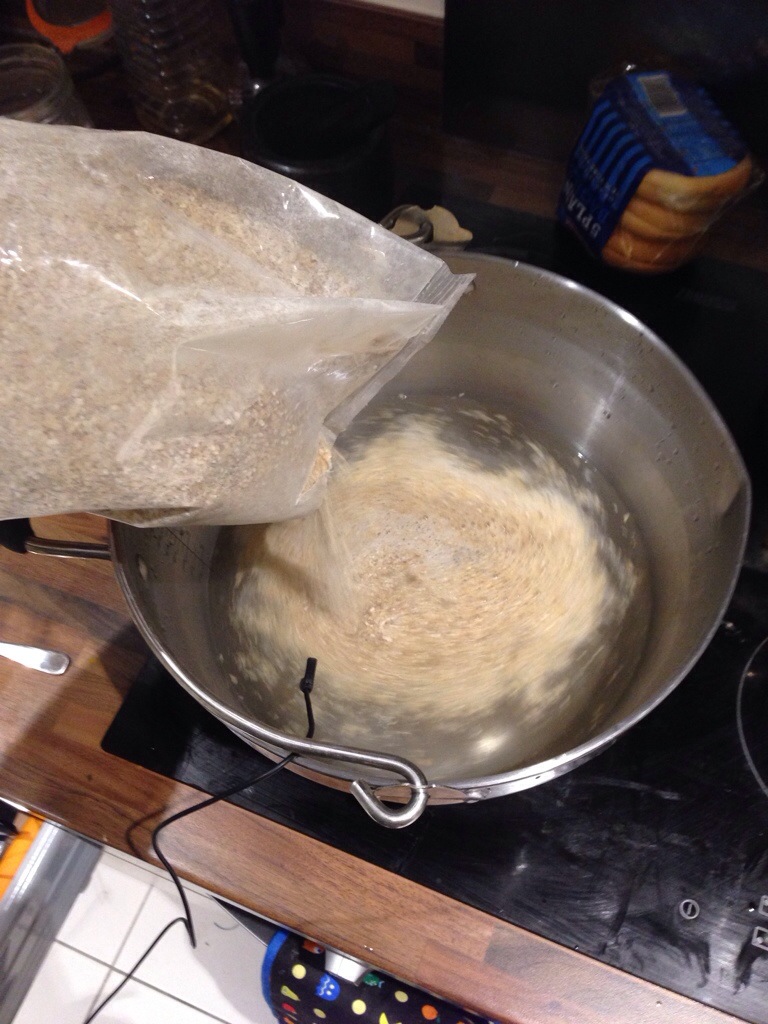

The Sparge
Simply straining the mash won’t extract enough sugar, by re-circulating the liquid you can pull more out. The sweet, malty liquid you collect is called a ‘wort’.

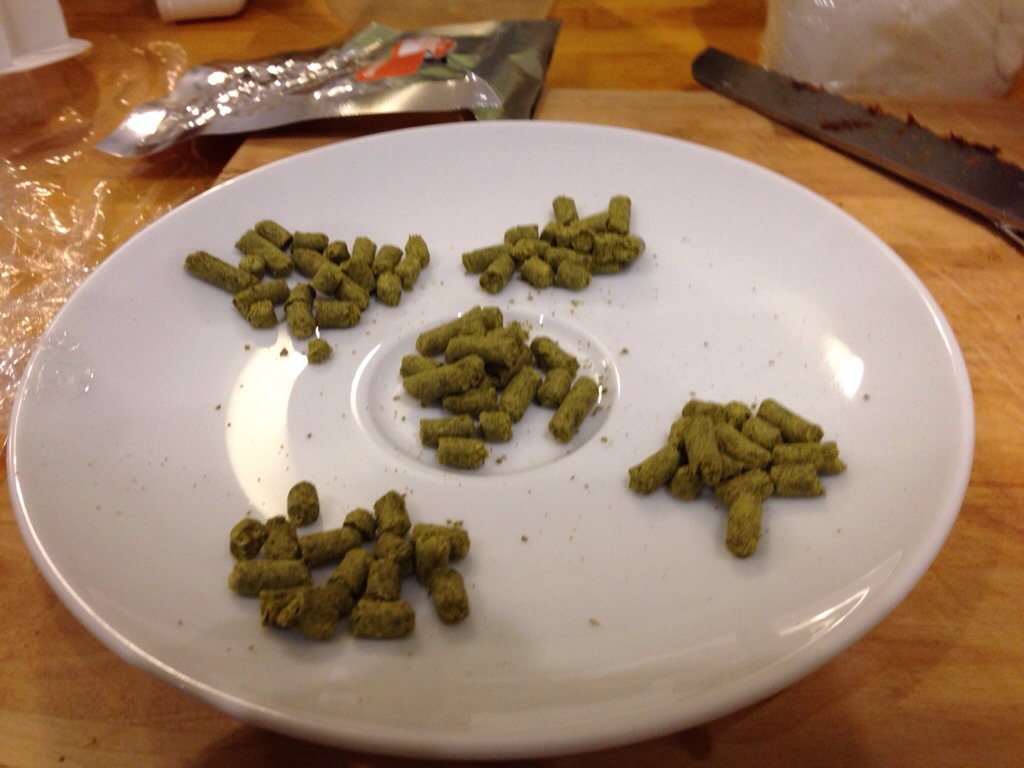
The Boil
On it’s own the wort would be a very dull beer, hops are the traditional method of adding flavour and normally come in two groups: bitter and aromatic. When the wort is first boiled it will foam quite dramatically – this is known as the ‘hot break’. The wort is then held at a gentle boil for around an hour with different amounts of hops being added in intervals to build up an overall flavour profile.

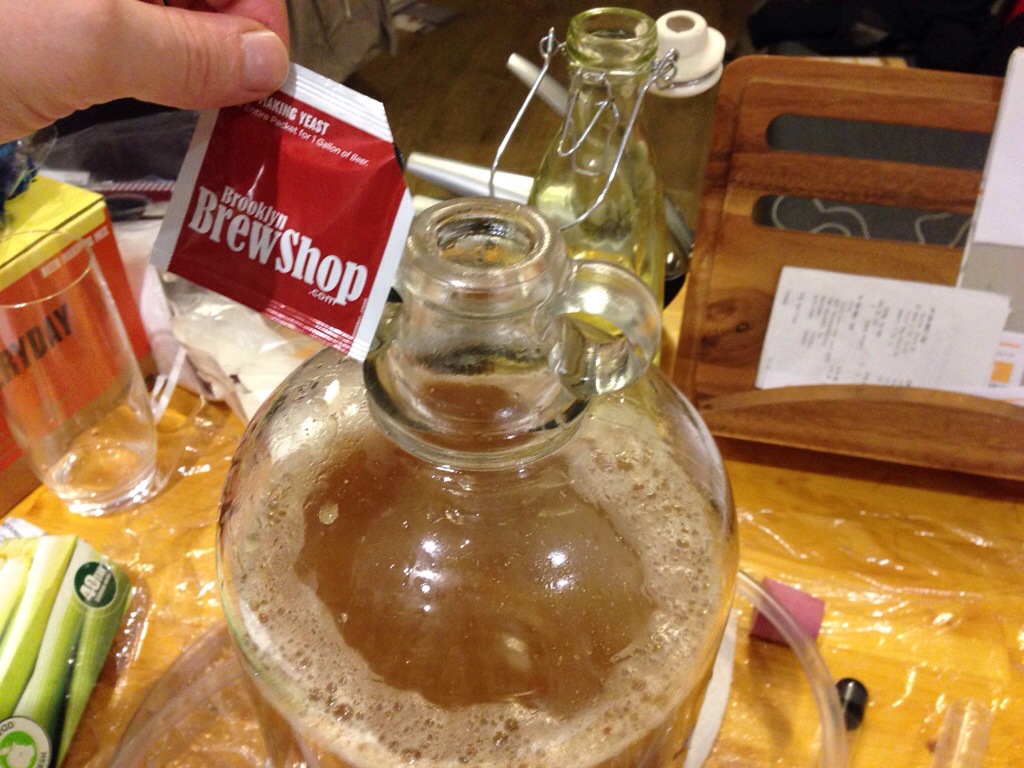
Fermentation
Once the boil is complete, it needs to be cooled – adding the yeast at anything above room temperature would kill it. Once chilled you ‘pitch’ the yeast (pour it in) and leave to ferment. The first few days can be quite dramatic so a simple airlock is the best method of protecting your precious brew.

Bottlling
Fermentation will finish after about two weeks, you can then bottle your beer. To create a natural carbonation you add a small of amount of sugar (or honey in this case) to the batch. This gives the yeast something to work on again, trapped in the bottles the gas it produces will be reabsorbed back into the beer, making it fizz.

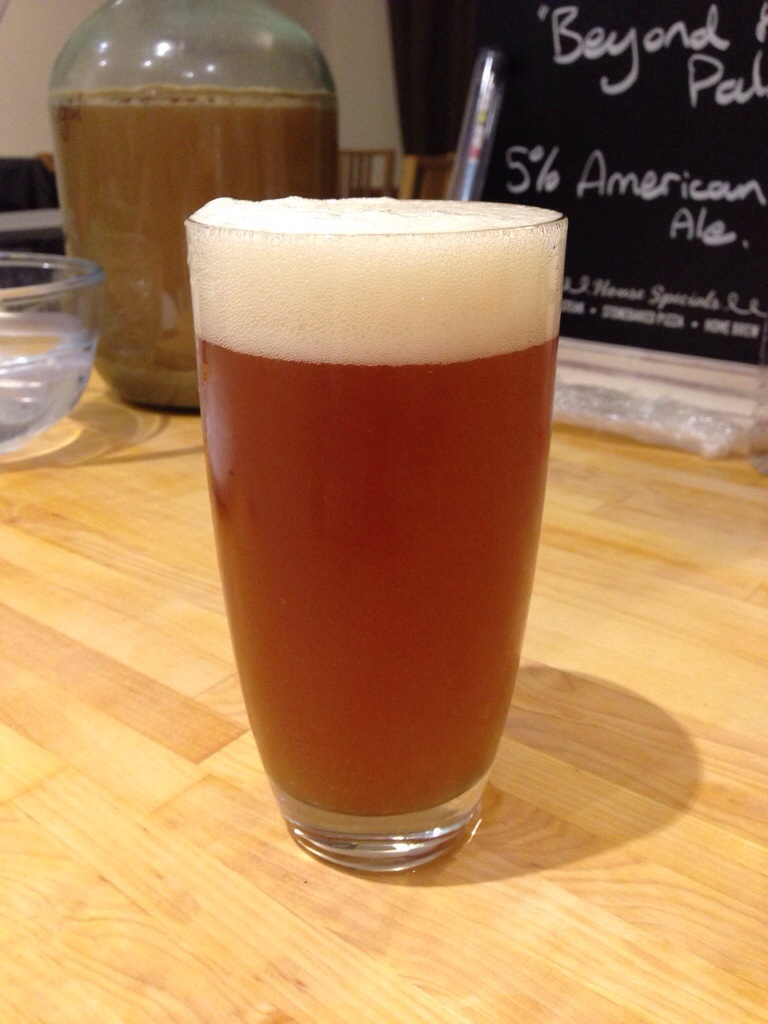
Tasting
By far the most important step. I normally wait three-four weeks before opening a bottle, this lets it rest and clear. It’s a good idea to let it chill overnight in the fridge as well – IPAs should definitely be served cold. What did it taste like?
Really rather good. It’s a lovely amber colour and, once it’s had time to mature, suitably clear. The nose is very subtle for an IPA, with a lovely citrus tang coming through. There’s a hit of smooth, sweet malt, a lovely bitterness from the Columbus and the perfect amount of fizz in the mouth. Marvellous.
Conclusion
Making your own beer is very simple – using a kit removes most of the risk and produces something that is surprisingly drinkable. Once upon a time every family would have brewed up their own beer – it’s a great British tradition that deserves rediscovery. It’s so easy and incredibly rewarding. Get involved!
The Geeky Details
“Cereal Offender” – Everyday American IPA – Brooklyn Brew Shop
Grain Bill: American 2-Row (Base), Caramel 20, Victory, Munich
Hops: Columbus (Bittering), Cascade (Aroma)
Original Gravity – 1.060 – (3rd Jan 2014)
Final Gravity – 1.010 – (17th Jan 2014)
ABV – 6.6%
Tasting Notes – Rich, sweet malt, lovely hoppy tang and a really good carbonation. Delicate citrus nose and very nice head retention.

Pingback: Stone Brewing Co – Enjoy By | Rob's Food Blog