Smitten Kitchen Cookbook

Blogging has undeniably changed the the way people think about, and enjoy, food. It’s democratized the previously restricted world of restaurant reviews and taught millions how to cook exciting new dishes. One of the first blogs to break into the mainstream was Deb Perelman’s ‘Smitten Kitchen’.

A self-taught chef, cooking in her tiny New York kitchen, she writes about food that even the most timid of readers can manage. It’s simple, honest and entirely delicious. Her eponymous cookbook was launched before Christmas in the US and is finally getting an outing in the UK.

20130305-194852.jpg

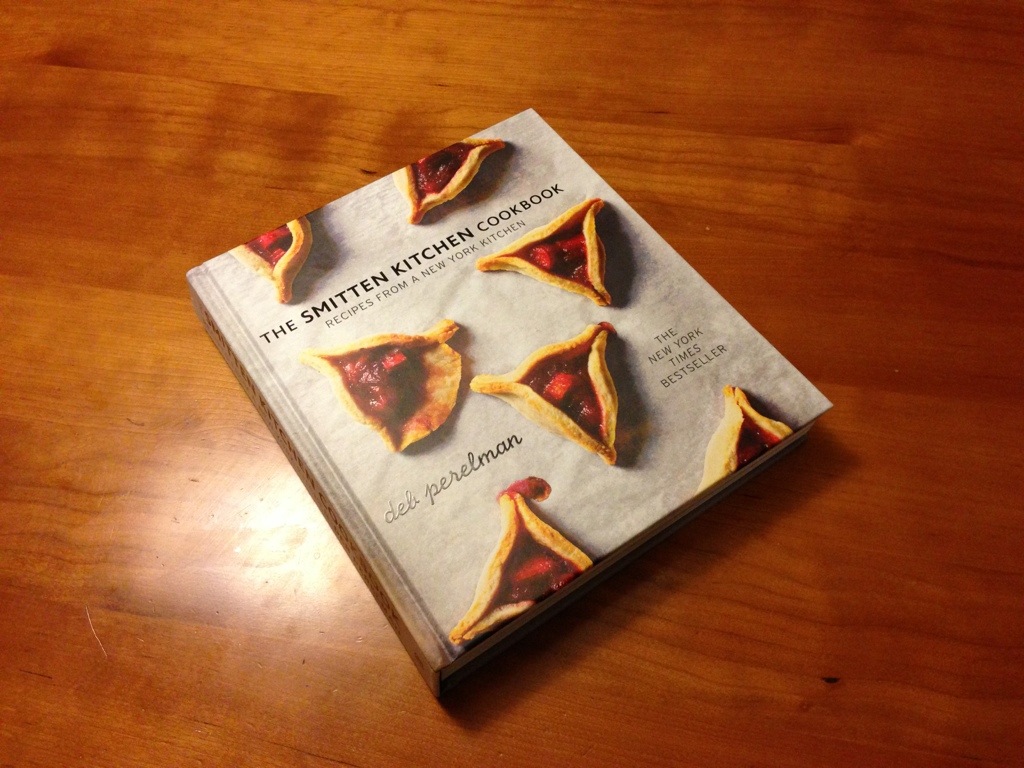
The book includes a great range of recipes, from breakfast through to dessert. All the measures have been converted from American to British and most of the temperatures and ingredients too. The photography – done by Deb herself – is fantastic, and the introductions to each recipe are beautifully written.

Over the last couple of weeks i’ve been working my way through several of the recipes…
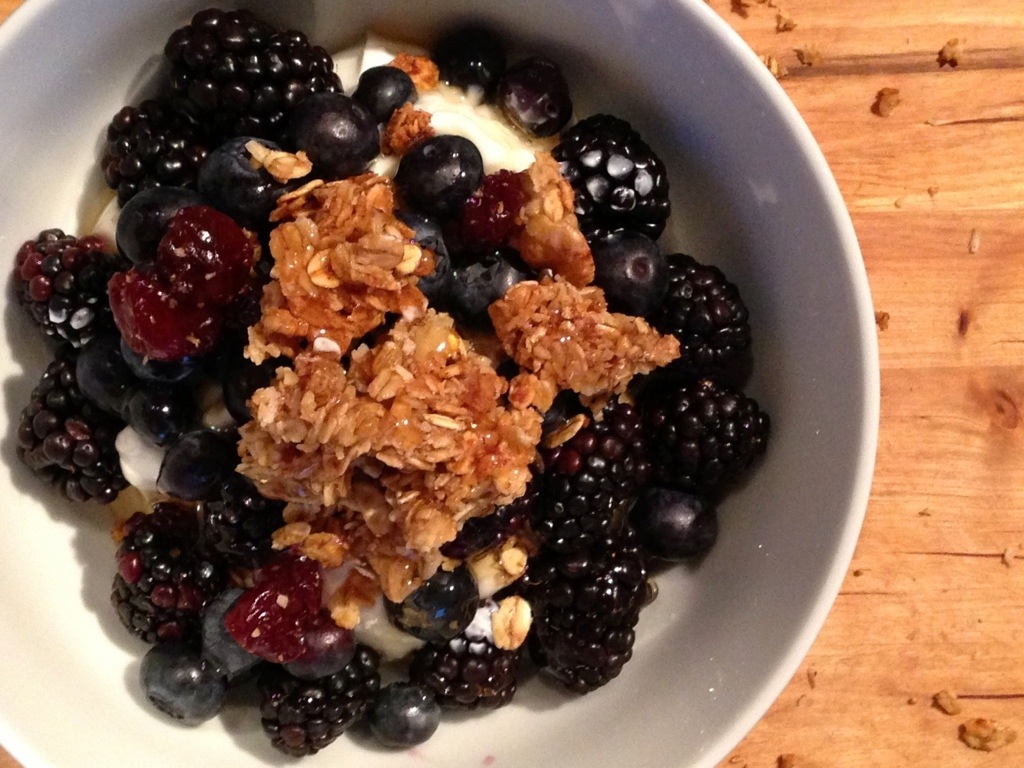
Crunchy Granola
Keen to try something from her breakfast section I baked this granola on a quiet evening. It’s delicious – like flapjack for breakfast. She uses minimal quantities of sugar and golden syrup to ensure that it stays in the same ballpark as healthy and it goes great with greek yoghurt and fruit.

20130305-194303.jpg

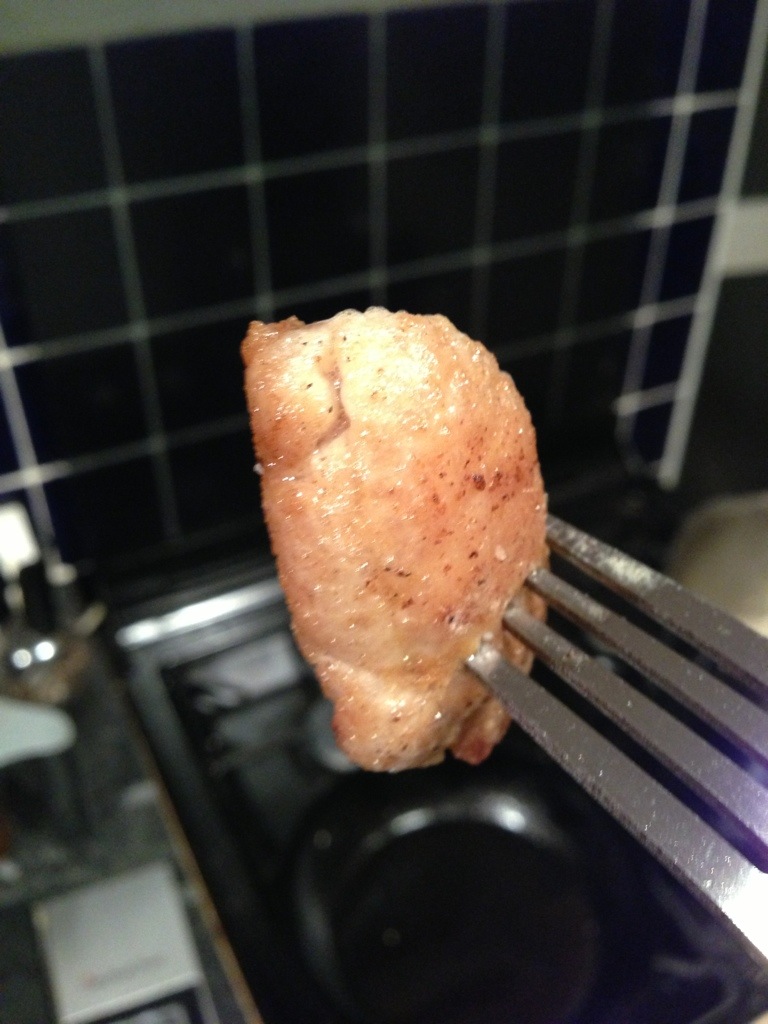
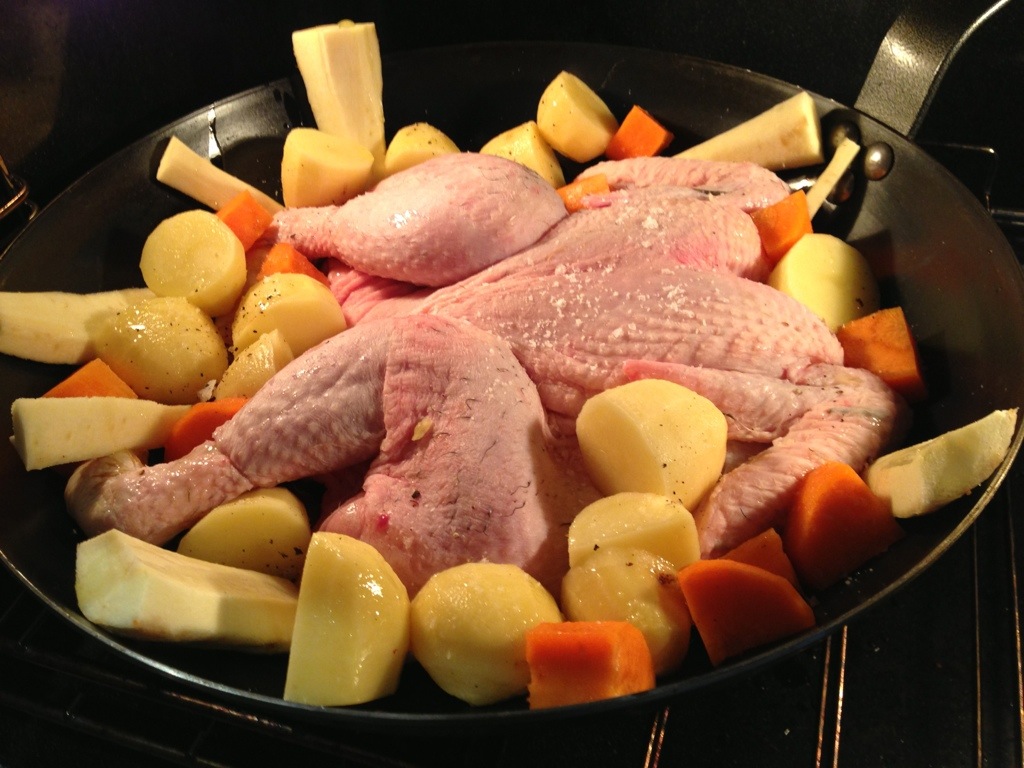
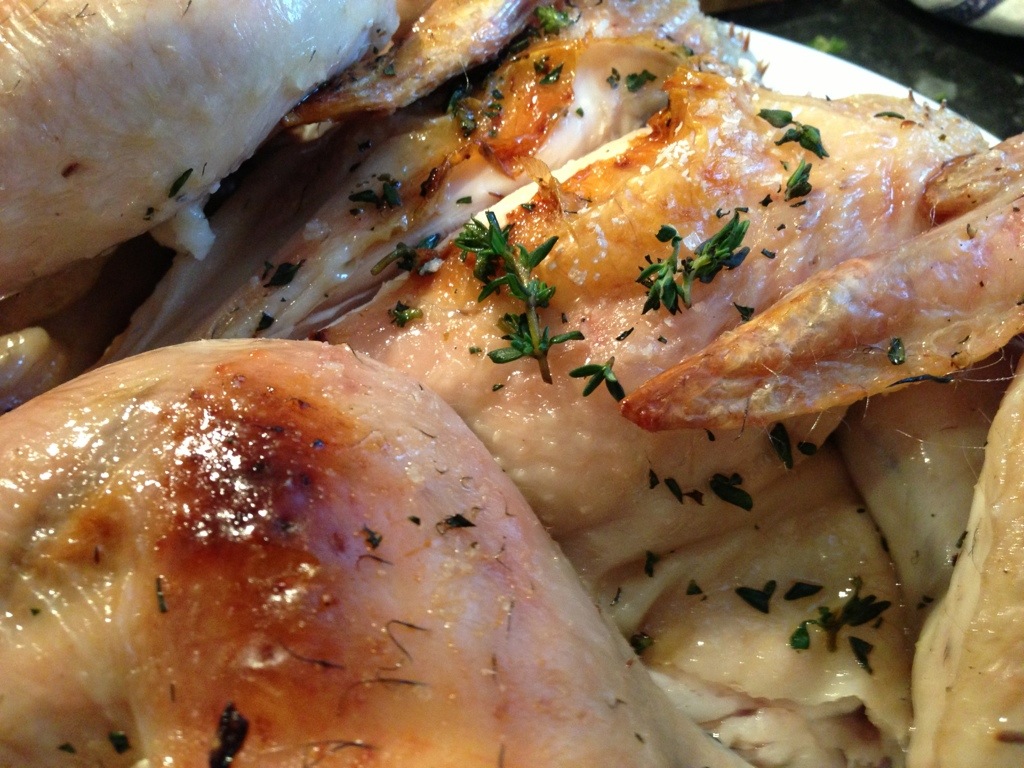
Flat Roasted Chicken with Tiny Potatoes
This recipe didn’t work great for me – the instructions don’t really tell you how to spatchcock a chicken (chop out the back-bone and smash it flat) so it would be easy to get wrong. The tiny potatoes took quite a while to cook through and – given that you’ve got a pan that’s covered in chicken jus, not making a simple gravy is almost criminal.

20130303-154323.jpg

20130303-154330.jpg

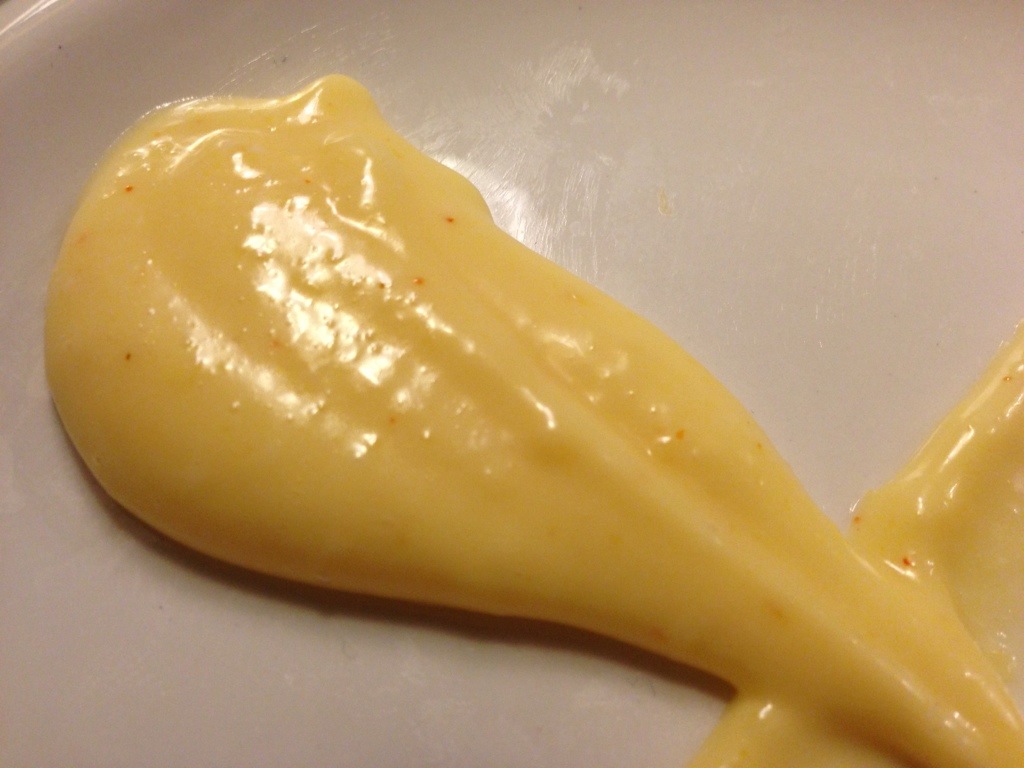
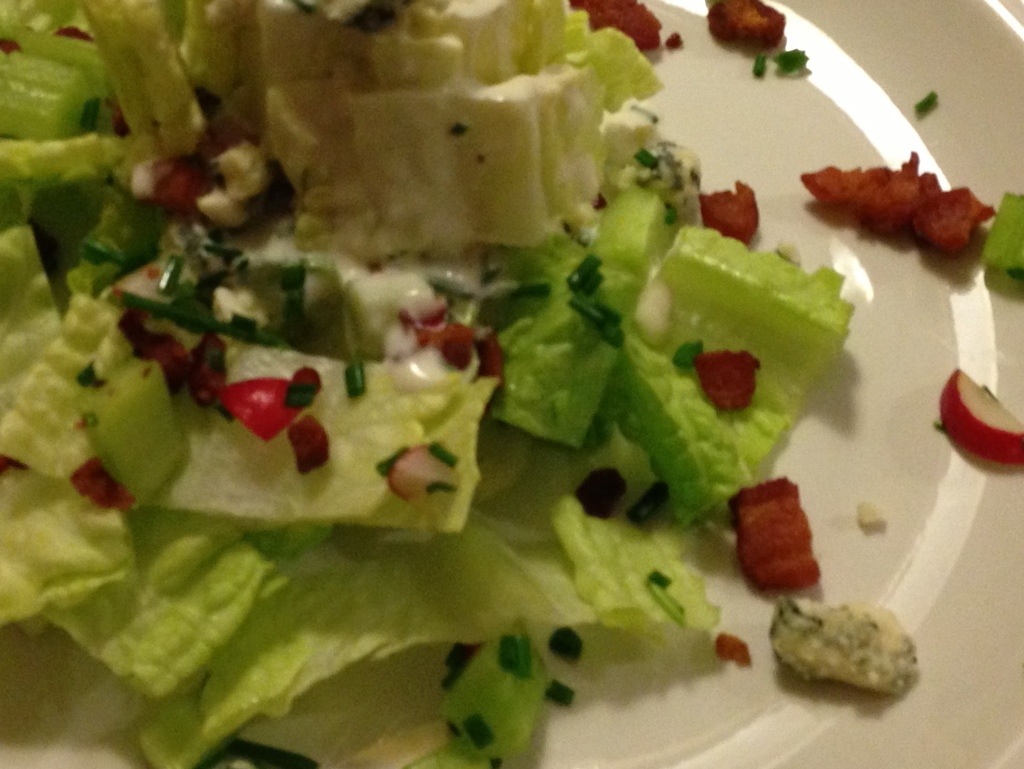
Iceberg and Blue Cheese Salad
This is a great quick salad – tasty, simple and light.

20130305-194318.jpg

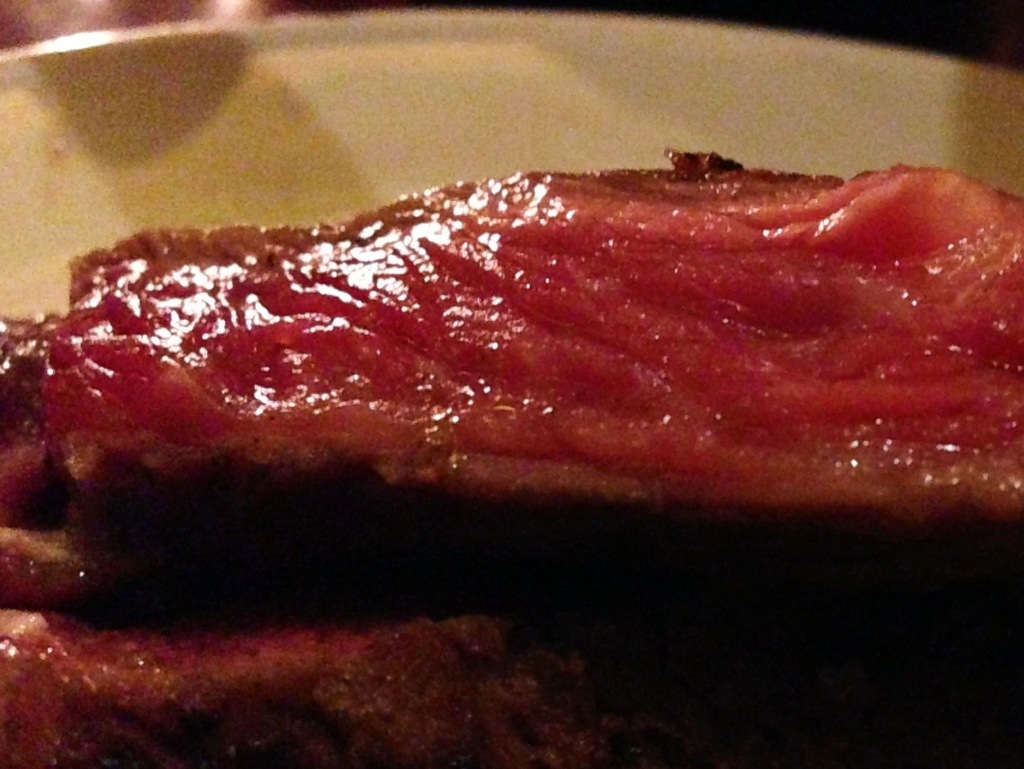
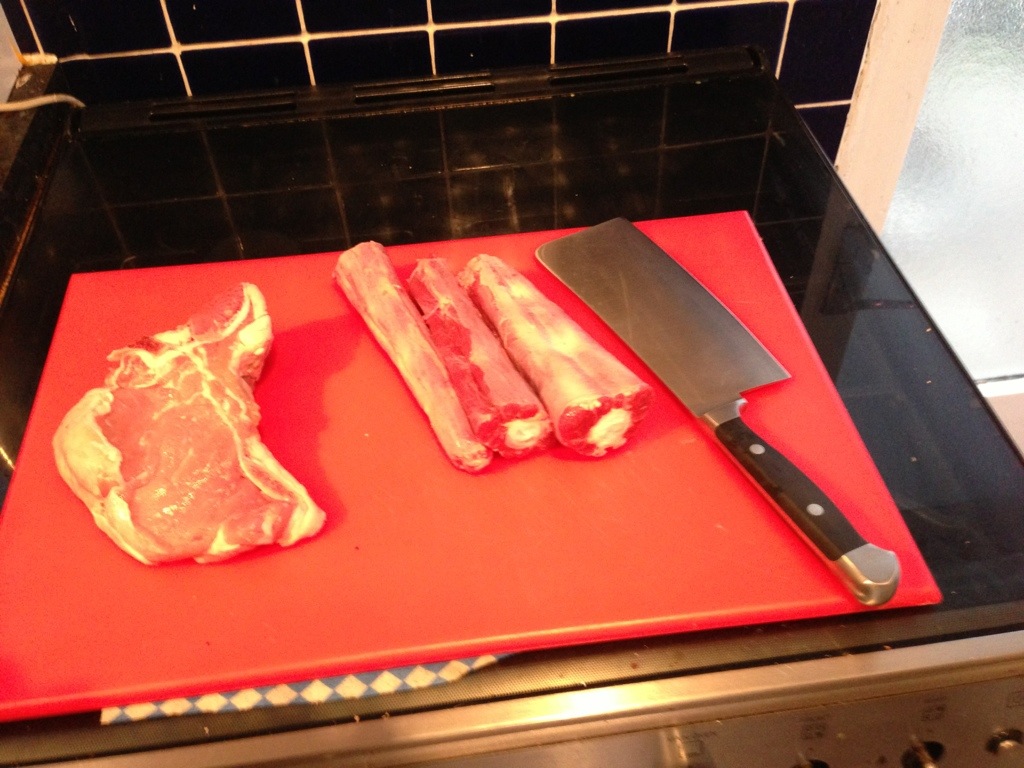
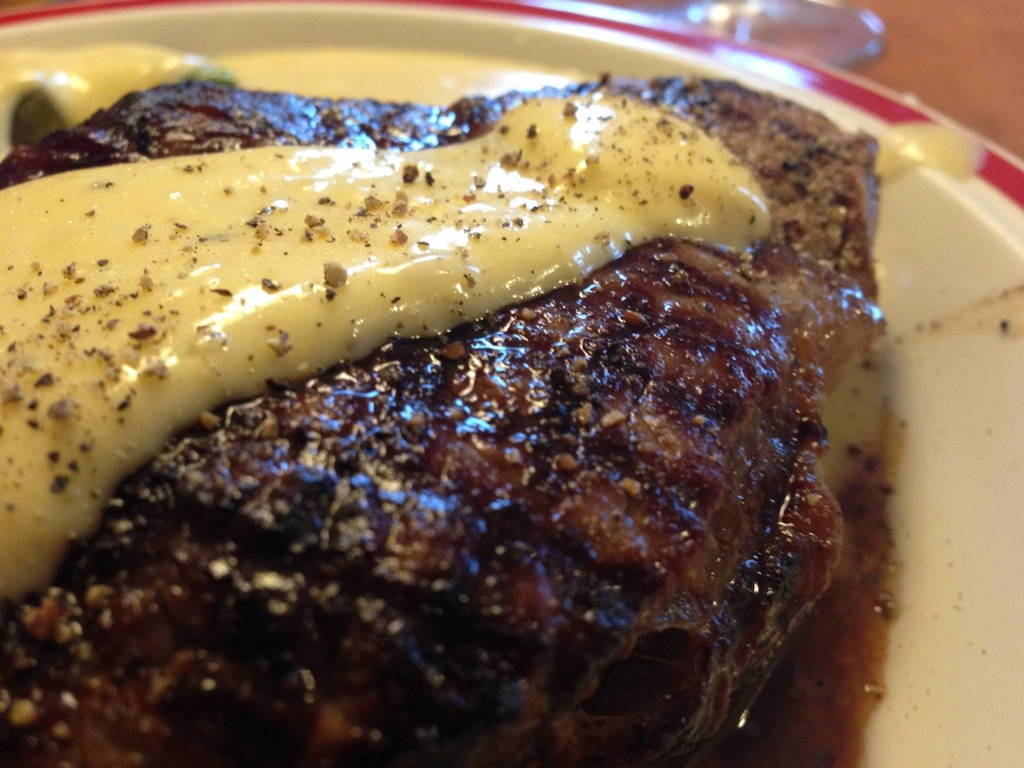
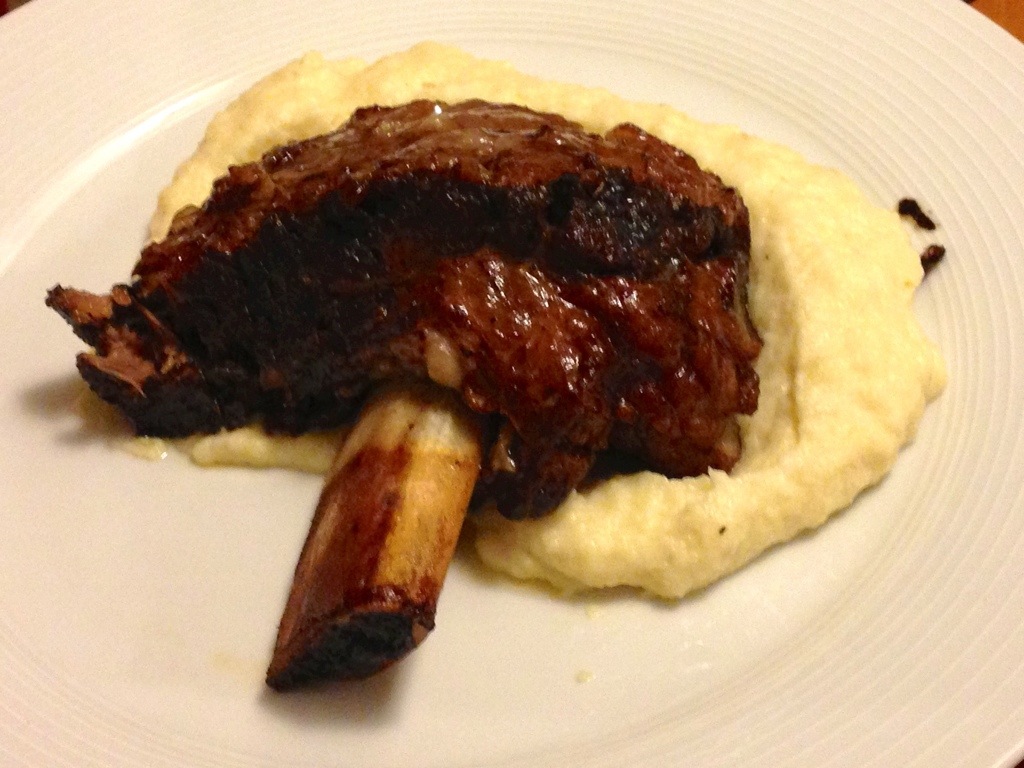
Beer and Balsamic Braised Short Ribs with Parsnip Puree
I love short ribs. They capture huge amounts of beefy flavour and provided they’re cooked carefully have a fantastic texture. In this recipe the ribs are browned before being slowly braised in beer, balsamic and beef stock. It’s fall apart tender – the sauce reduces down great and the parsnip puree is a perfect side. I love that she adds horseradish – it goes really well with both the beef and the sweet parsnips.
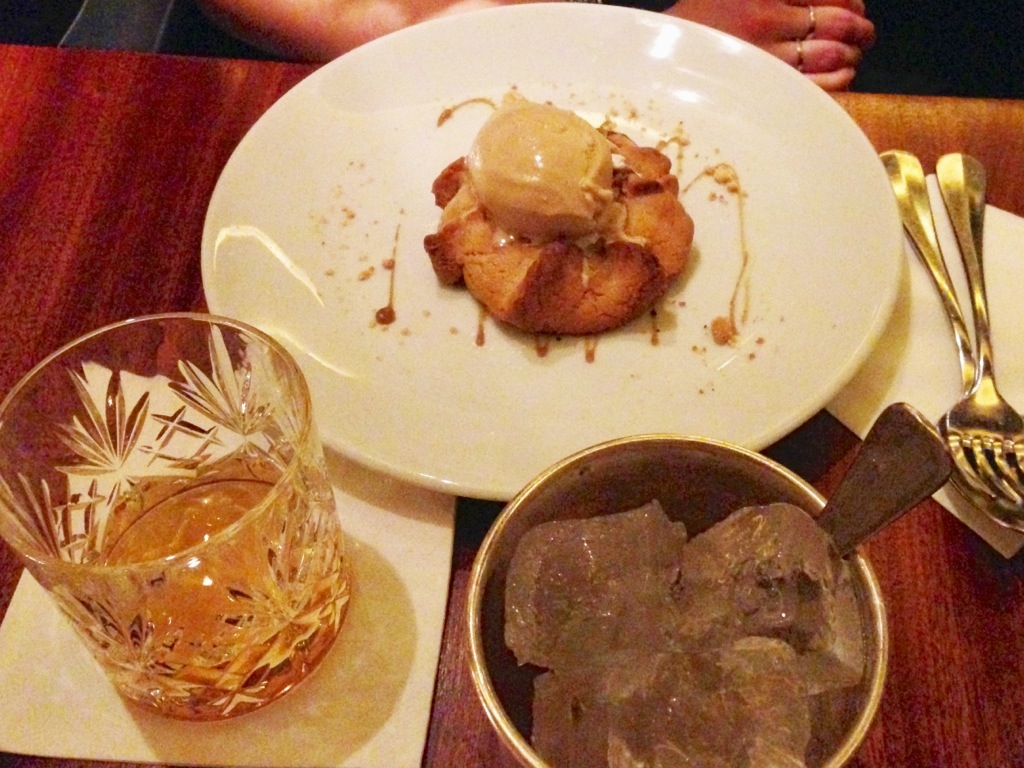
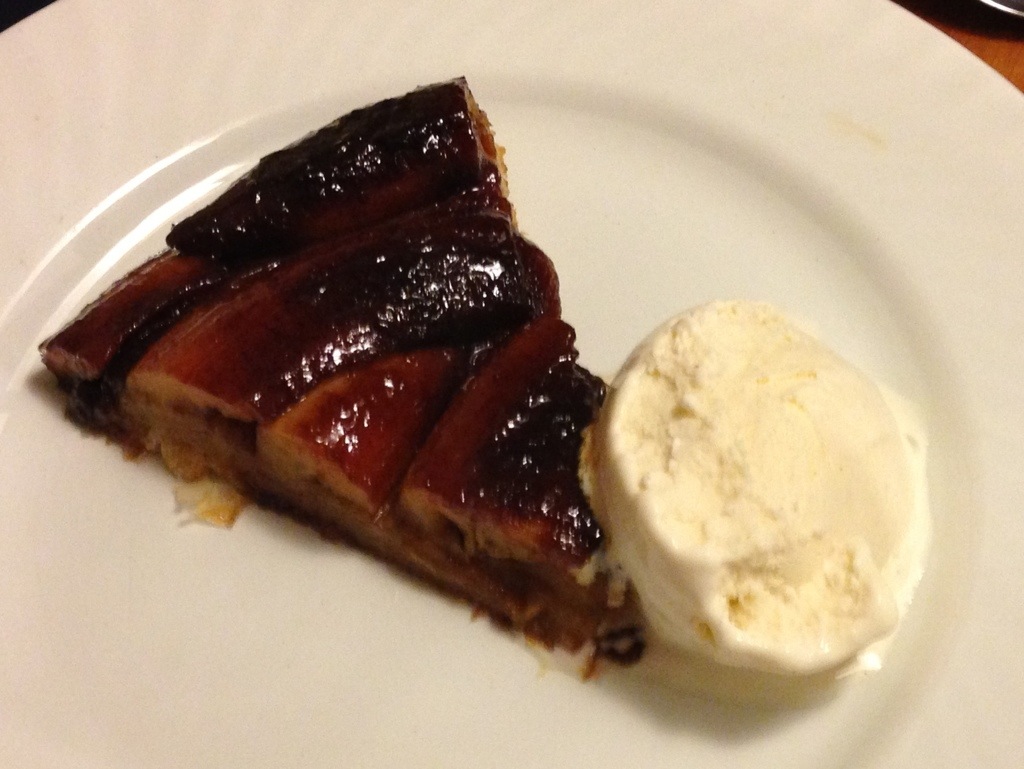
20130305-194601.jpg

Banana Tarte Tatin
I love tarte tatin, but i’ve never tried a banana one. Keen to take my shiny new (just seasoned!) skillet for a spin I gave this a try. It works brilliantly – the bananas go a lovely dark caramel, the sauce is rich and the pastry – well, who doesn’t like light, fluffy pastry!?

20130305-194331.jpg

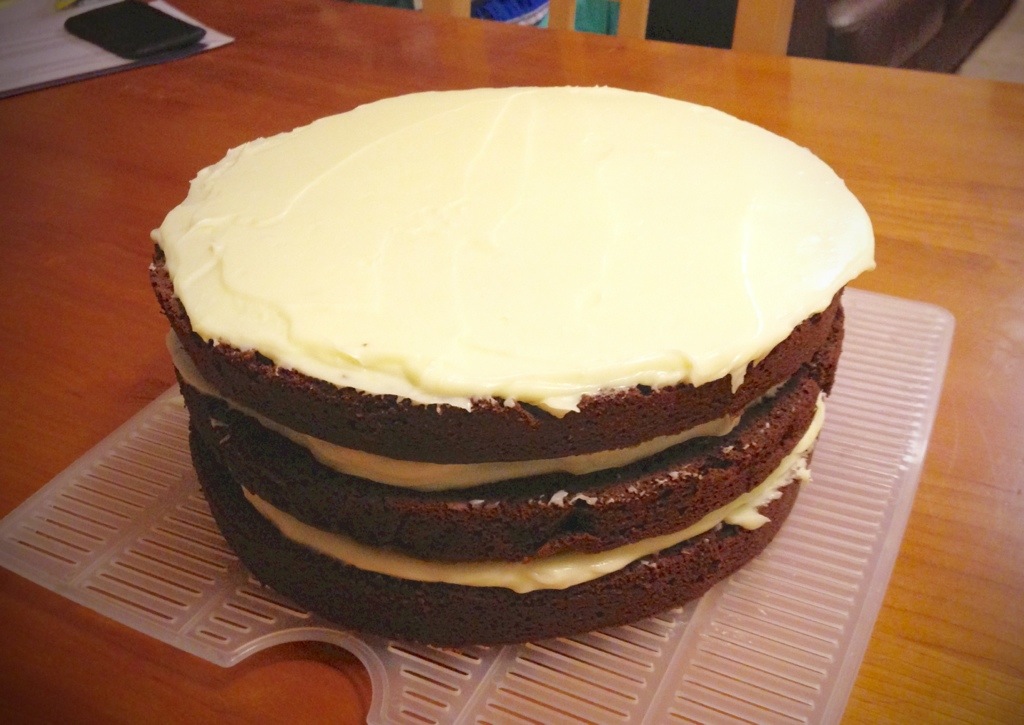
Red Wine Velvet Cake
I baked this for a colleague’s birthday. I really like the idea of replacing the red food colouring with wine – it adds a surprisingly delicate fruity note and ‘most’ of the alcohol gets baked off anyway. The result was fantastic – moist, rich and completely delicious. It caused a feeding frenzy – the entire three layer cake was demolished in seconds. Those too slow off the mark spend the rest of the day giving me baleful looks. I’ve posted the recipe here.

20130305-194858.jpg

Conclusion
It’s a great book, if like me and many home cooks, you have a tiny kitchen and limited resources then this is perfect for you. It’s simple, unashamed home cooking and utterly marvellous for that. Almost all the recipes I tried were fantastic – I spotted a couple of printing errors which should be fixed in the next run, but otherwise it was very reliable. Ingredients are relatively easy to find and I love that she includes lots of variations and tips for preparing things in advance and saving things for later.

‘The Smitten Kitchen Cookbook’ by Deb Perelman, RRP £20, is published by Square Peg and available from all good bookshops

Hawksmoor – Seven Dials

I love Hawksmoor. To me it represents everything a restaurant should be. It picks one thing – steak – and does it superbly. Everything else is designed to enhance and work with that ingredient. From the funky British starters, the red-heavy wine list to the serious puddings and relaxed atmosphere. I’ve been several times now and it never disappoints.

To start I had crab on toast – a fluffy mound of fresh white crabmeat on good bread. Simple, tasty and well seasoned.

20130215-211317.jpg

For the main event we shared both a bone-in sirloin and a ribeye. The steaks were cooked beautifully – thick cut, well aged and with an excellent char. The rib-eye was medium rare (as requested) and the extra time helps soften up the meat. The sirloin was nicely rare and really showcased the texture of the meat. I can’t get over how good the fat is on beef that’s been dry aged this long.

20130215-211327.jpg

The sides were great as ever – they’ve changed the beef dripping chips from mini-roast potatoes to French style fries – but the same beefy flavour works so well with the steak. Triple cooked chips were more traditional and as crunchy as you would expect. We also ordered some creamed spinach which was a great match, smooth and with a lovely mineral hit. Wine was a very reasonably priced Bordeaux: classy, sophisticated and with a lovely nose.

20130215-211323.jpg

20130215-211334.jpg

The dessert menu had also moved on since my last visit – my chocolate salted caramel tart was superb – the base was very crisp. The popcorn ice cream was a lovely touch, but could have done with some more crunch. My friends warm peanut butter shortbread was delicious with some excellent salted caramel ice cream.

20130215-211338.jpg

20130215-211343.jpg

The finishing touch was a couple of great whiskies from their extensive selection – a near-perfect meal. I can’t wait to try out their new site in Air Street which has started doing fish as well as meat.

Hawksmoor Seven Dials on Urbanspoon

Crazy Bear

I recently went out for dinner with my colleagues – given that we needed to cater for a couple of vegetarians, Asian food is a good bet and it’s proximity to our office made Crazy Bear a great choice.

We had their ten plate set menu – which runs as follows:

20130215-205747.jpg

Steamed Har Gau, Prawn, Shiitake, Chive and Carrot, Bamboo and Taro
The dimsum was great, the prawn being a complete standout – deliciously moist and with a great casing.

20130215-205801.jpg

Salmon and Avocado Tamaki
Sushi may not be their strong point – but the tamaki was very good. I’d have liked a little more salmon.

20130215-205755.jpg

Cotswold Chicken Satay
The chicken was moist and the sauce sticky – I like my satay with slightly more of a crust, but this was still really good.

Crispy Gressingham Duck Salad
This was delicious – I like duck in salads and their choice of leaves added a great textural contrast.

20130215-205806.jpg

Chargrilled Black Pepper Lamb Cutlets
The lamb was well cooked and the flavour of the pepper really came through.

Steamed Seabass Fillet
The fish was well cooked, if a little under seasoned.

Panang Beef Sirloin Curry
This was my favourite dish of the evening – good beef, nice sauce and well cooked.

Sides
Choi Sum
Stirfried Beansprouts
Jasmine Rice

Salted Butter Caramel with a Chocolate Sorbet
The caramel was very creamy and thick, while the chocolate sorbet was smooth and rich. Simple but effective.

20130215-205812.jpg

On the whole, the food was very good, service was prompt and the staff friendly. They have a good wine list with some outstanding wines. Hannah’s pick of a Californian Merlot was just phenomenal – rich and classy like the best Bordeaux.

Crazy Bear on Urbanspoon

Ramen

Regular readers will have noticed my recent japanese noodle obsession. There’s something really wonderful about a bowl of richly flavoured broth, soft but slightly chewy noodles and piles of delicious toppings. Having sampled some of the best ramen london has to offer (Tonkotsu and Shoryu) as well as several of the chain versions I decided to give it a go myself.

I’m an enormous fan of Momofuku so it seemed obvious to attempt their recipe. Broadly speaking there are two stages – preparing the broth and then bringing all the components together. Making really good stock is no light undertaking – you need slow careful cooking, broadly speaking more time equals more flavour. Several restaurants quote up to 24 hours for their stocks – unfortunately that’s not really feasible for a home chef, but nonetheless, on a quiet Saturday I gathered all the ingredients and set too.

20130209-213724.jpg

Momofuku’s stock is based on layers each one adding something new and building a very complex flavour profile. You start by boiling up and steeping your water with konbu, which is an edible kelp that contains a lot of natural MSG. In a traditional recipe you’d now add katsuo-bashi (shavings of petrified rotted fish) but Momofuku get’s their umami hit from bacon. This relatively light seaweed and savoury stock is called ‘dashi’ and is the basis of almost all ramen.

20130209-213744.jpg

Next we boil up some chicken to add richness and a light meaty flavour. They use a lot of pieces, but don’t despair – once it’s finished the leftover meat is great for soups, salads and sandwiches.

20130209-213803.jpg

Once it’s boiled for a few hours you switch to some roasted pork bones – this is the heart of the ‘tonkotsu’ style ramen. The pork bones simmer as long as possible before being switched out for some vegetables.

20130209-213813.jpg

Once your broth is finished you need to skim off the frankly scary layer of fat and portion it up ready for future use. The final step is to season the broth using ‘tare’. Since Momofuku provide a recipe I made my own by cooking down some chicken carcasses with mirin, sake and soy sauce. The result is a thick sweet/salty liquid that tastes very intense..

20130209-213821.jpg

The actual assembly of the finished dish is relatively straightforward and you can use whatever toppings you like. I followed Momofuku to the letter and went with pork belly, pulled pork shoulder, fish cakes, slow-poached eggs, nori, greens, braised bamboo and spring onions. Fresh ramen noodles are surprisingly hard to get hold of, thankfully Shoryu sell their (incredibly good) version for you to cook at home.

20130209-213829.jpg

What did it taste like? Pretty good for a first attempt! The broth is lovely, if ever so slightly over seasoned – especially after a whole bowl! I was worried it would taste too ‘porky’ but if anything more bones would have helped! In terms of toppings – next time i’ll slow cook bigger pork joints so they’re much softer and add something with a bit of ‘crunch’, little bits of pork crackling would be great.


Shoryu

One of the great trends of 2012 was the explosion of ramen in London and it shows no sign of letting up in 2013. Tonkotsu and Bone Daddies have dominated the ‘most talked about’ lists for the last few months (you can read my review of Tonkotsu here). On a rainy weekday evening I ventured through Soho to one of their newer challengers – Shoryu.

20130208-104622.jpg

Situated on Regent Street, just south of Piccadilly it’s a great location. When we turned up there was no queue but when we left people were waiting for 45 minutes in the rain for these noodles. Are they worth the hype?

20130208-104542.jpg

Absolutely. The noodles themselves are beautiful, just the right consistency with a little bit of firmness. The broth in their signature ramen (there are over fifteen variations to choose from) was rich and salty – their miso base is very different to Tonkotsu’s. The toppings were generous with some great pickled ginger, nice nori and an average egg. The pork belly was very good with a lovely texture

What really sealed the deal were the sides. The special ‘Hirata’ buns are very reminiscent of Momofuku in New York, thick slices of pork belly with sriracha, pickled cucumber and a steamed bun. Heaven.

20130208-104517.jpg

We also opted for their softshell crab – while the serving was pretty small it was phenomenally tasty with a nice chilli dip.

20130208-104422.jpg

The staff were friendly and attentive and the atmosphere lively and communal – my dining partner didn’t care much for the sporadic drum banging and japanese greetings but they made me smile. How does it compare to Tonkotsu? Very well – I think Shoryu just has the edge, especially if you consider the sides which seem almost an afterthought at Tonkotsu. Early reviews I read of Shoryu were quite critical but it’s obvious they’ve listened because I didn’t recognise the food the bloggers described. I can’t say how it measures up to Bone Daddies but I hope to be completing my Ramen round-up soon!

Shoryu on Urbanspoon

Marmalade

Like brewing, pastry and baking, preserves are one of those fascinating areas of cookery that is an entire artform in itself. From pickled eggs to strawberry jam the goal is to make food last, to allow seasonal produce to be enjoyed at any time of the year. Winter can be a bit sparse for british produce, but further afield things are well underway.

20130122-150512.jpg

Seville oranges are in season for only a couple of weeks each year, they a relatively small and much tarter than a normal variety, this translates to excellent marmalade! If you’ve never tried making it before you really must, it’s simple and very rewarding. If made carefully it should last for up to two years and makes a great gift.

20130122-150604.jpg

There are lots of different recipes available and i’ve tried a couple over the years, Delia offers a good option but it ends up very strong, my favourite is one from Pam Corbin, it creates quite a delicate flavour and softens up the peel nicely.

Marmalade

Ingredients
Makes 6-7 x 450g jars
1kg Seville Oranges
75ml lemon juice (fresh)
2kg demerera sugar (my sainsburys does convenient 2kg plastic bags of it)

Method
Scrub the oranges, remove the buttons at the top of the fruit, then cut in half. Squeeze out the juice and keep to one side. Using a sharp knife, slice the peel (pith and all) into think, medium or chunky shreds, according to your preference. Put the sliced peel into a bowl with the orange juice and cover with 2.5 litres of water. Leave to soak overnight or for up to 24 hours.

20130122-150739.jpg

Transfer the whole mixture to a preserving pan, bring to the boil, then simmer slowly, covered, until the peel is tender. This should take approximately 2 hours (mine was very tender by the 90 minute mark, so do check it), by which time the contents of the pan will have reduced by about one-third.

20130124-142329.jpg

Stir in the lemon juice and sugar. Bring the marmalade to the boil, stirring until the sugar has dissolved. Boil rapidly (to get a light flavour) until the setting point is reached – 104.5°C – about 20-25 minutes (I find it can take a little longer, more like 40 minutes on my hob).

20130124-142503.jpg

Remove from the heat. Leave to cool for 8-10 minutes – a touch more if the peel is in very chunky pieces – then stir gently to disperse any scum. Pour into warm, sterilised jars and seal immediately. Use within two years.

20130124-142822.jpg

Pied de Cochon farci aux Morilles

Some dishes are forever linked with their creator, or simply the chef who made them famous. Heston Blumenthal gets snail porridge, triple cooked chips, nitro poached tea and anything that involves an iPod. Raymond Blanc is known for his tomato risotto, Wylie Dufresne for his Chicken Balls and Ferran Adria for all manner of smokes, foams and spheres. What jumps into the mind of a serious gourmand when you say the name Pierre Koffman? Pigs trotter.

This dish is a masterclass in french cooking, taking excellent (and often underused) ingredients and creating something really wonderful. The premise is misleadingly simple – bone out a pigs trotter, braise it, stuff it with a chicken mousse loaded with morels and sweetbreads and serve with a rich sauce. Sounds good right!?

The first challenge is getting the ingredients – pigs trotters are ‘relatively’ common thanks to their use in sauces (as a natural source of gelatin) but they still need some tracking down. Thankfully Allen’s of Mayfair had a couple.

20130119-215706.jpg

The next item on the list is veal sweetbread – like most offal these should be as fresh as possible, very few butchers carry them but they are delicious. Contrary to popular belief, they’re not brains or testicles, but rather the thymus gland. They need to be lightly poached before having the membranes removed. Allen’s came up trumps again, but they only had the lambs variety (bovine/ovine – what’s a ‘b’ between friends!?) If you’ve never tried them – I urge you to give it a go, they are incredibly tasty. Little balls of savoury goodness, just dust them with a little flour and pan fry, the results are magical.

20130119-215816.jpg

Next up is the morel mushrooms. These generally appear from March to May and are a wonderful sign of spring – sadly i’m still in the depths of winter and the only place that could offer me some was Selfridges. Don’t ask about the price.

20130119-215856.jpg

The final piece was veal stock – Knorr sadly don’t make veal stock cubes so I threw together my own using Modernist Cuisine at Home’s recipe, it’s very fast and the result is thick and tasty.

20130119-215954.jpg

Boning out a pigs trotter is a culinary kilimanjaro. I’m quite happy gutting fish and skinning plaice but this is a whole new ball game. As we’re stuffing the trotters it’s very important not to puncture the skin. You have to carefully work the tip of your knife around the bones and thick sinews – it’s a real work out! The first trotter took thirty minutes, the second one was done in fifteen. Monsieur Koffman used to be able to do it in under a minute.

Once everything’s prepped the actual cooking is very easy – braise the trotter with some mirepoix, veal stock and port for a couple of hours. Meanwhile whip up a quick chicken mousse and fry off the morels and sweetbreads before mixing them through the mousse. Then simply stuff the trotters, roll in foil and chill in the fridge. When you’re ready to serve them simply pop them in the steamer and enjoy!

20130119-220030.jpg

What does it taste like? Amazing. I served it with some simple olive oil mashed potato. The pork is achingly tender, the chicken mousse is smooth and subtle, the morels are rich and nutty and the sweetbreads add a meaty, savoury note. The sauce – made from reducing the cooking stock – is very rich and smooth. It’s a magnificent dish, easily one of the nicest i’ve ever tried. It’s sophisticated, balanced and honest.

20130119-220102.jpg

When I do it again, i’ll order larger trotters so there’s more room for stuffing. I’ll also make sure I braise them at a much lower temperature so there’s less splitting. The only way I could improve on the dish is to copy the garnish Koffman uses in his restaurant – thin slices of pork crackling. A little crunch would be wonderful. Apple/parsnip crisps would accomplish the same goal.

Technically it’s been a great challenge, but the rewards are well worth it – if you fancy taking it on i’d really encourage you – get everything ordered well in advance, book out a whole day and invite some friends round for dinner. They’ll be stunned.

Hollandaise 101

This is the first in a series of posts looking in detail at some common recipes, understanding the science behind them and trialling a number of different approaches. We’ll start with the humble hollandaise sauce.

20130108-203434.jpg

One of the mainstays of French cuisine – Escoffier classed it as one of his mother sauces – it is incredibly flexible. It’s delicious served with vegetables, like asparagus, or poured over freshly cooked meat or fish. It can be served with poached eggs for breakfast or used as a starter. It takes well to flavourings and can be turned into a Mousseline with the addition of some whipped cream and a Maltaise with addition of some orange juice.

Definition
A hollandaise is a rich sauce, made with egg yolks and butter. It is very similar to a béarnaise, the only difference being the flavourings, often in the shape of fresh herbs like tarragon. Mayonnaise is another close cousin, the key differences being the inclusion of mustard and switching the butter for oil. Hollandaise is traditionally flavoured with white wine vinegar and/or lemon juice. If you want a little more heat – cayenne pepper is another common option.

The Science
Like many simple condiments, a hollandaise is essentially an emulsion, a mixture of water (normally in the form of vinegar) with a fat or oil (here, butter). Naturally these two ingredients won’t mix on their own, fat has a tendency to ‘clump’ together which can be very inconvenient to a chef. If the fat clumps then it will float to the top (as it is less dense) this is what happens when a sauce ‘splits’. In some situations, such as salad dressings, mechanical force is enough to break the fat ‘globules’ down into smaller pieces and distribute them throughout the water. This is inherently unstable and over time the two parts will separate out again. In order to keep the two components apart we need some way of overcoming their natural tendencies: an emulsifier.

There are several options but by far the most traditional is an egg yolk. These are packed full of a substance called ‘lecithin’ which is very good at keeping the two components separate, one egg yolk will emulsify up to 2kg oil. It does this by coating the outside of the fat globules with little molecules. These molecules are tadpole shaped, with a round head and long tail. The tails attract fat, while the round heads attract water. This means that the fat globules become coated with the emulsifier (think of an orange or onion studded with cloves and you’re very close). Substances which work like this are known as ‘surfactants’ and it’s exactly the same way detergents cut through grease on frying pans. By coating the outside of the globules, the fat can’t clump together, keeping the sauce silky smooth.

Egg yolks do have some limitations though, they are very temperature sensitive. Harold McGee lists the upper limit as between 70-77ºC. This is strongly affected by pH – adding enough lemon juice to lower the pH to 4.5 allows you to heat the sauce to around 90ºC without splitting it. The sauce will also thicken quickly as it cools and form an unsightly skin – it’s best kept at around 63ºC.

Methods
McGee lists five different ways of making a hollandaise:

  1. Cooking the egg and vinegar mixture, then add whole butter. This is the method used by Carême.
  2. Warming the eggs and vinegar, then whisking in the butter before cooking the sauce. This is Escoffier’s method and gives you much more control over the consistency, though it is very easy to overcook the sauce.
  3. Put all the components in a pan together and whisk as you heat them.
  4. Don’t cook the eggs, just warm them and pour in the liquid butter. You can’t split the sauce this way.
  5. Whip the egg yolks over heat with some water to make a sabayon, then add the butter.

Many popular chefs provide recipes in their cookbooks, Michel Roux and Delia Smith propose Method 4, while Joel Robuchon and Gordon Ramsay suggest Method 5.

Modernist Cuisine offers an interesting variation on Method 1 – by using a sous vide bath to cook the egg yolk/vinegar mixture first you can remove almost all the risk from the sauce.

20130108-201321.jpg
You simply whisk the butter into the cooked mixture and you’re done! The advantage of a sous vide approach is that you have exact control over the level to which the yolks are cooked. By going slightly warmer and cooler you can adjust the thickness (63ºC creates a light sauce, 65ºC a normal one, 67ºC a thick one).

Results
I tried several of these variations and here are my conclusions:
Method 1 (Modernist Cuisine) – This produces a very stable sauce and is largely foolproof. They flavour the vinegar mixture with wine and shallots, which add a lovely acidity. The texture is very thick and smooth, but it still pours. This set an excellent benchmark.

20130108-201636.jpg

Method 4 (Delia/Michel Roux) – This produces a lovely sauce, though it lacks the body of the Modernist Cuisine option. They both suggest plenty of lemon juice which adds a citrus tang, while loosening the sauce. If you want that acidity without the liquid, try a little malic acid.

20130108-201837.jpg

Method 3 (McGee) – I didn’t think this would work, but it does. Incredibly easy, you can even weigh the ingredients in the pan (if your scale tares). Simply pop it on a nice low heat and start whisking, a minute or two later you’ll have perfect hollandaise! It does rely on you knowing when to stop, if you push it too far it will overcook and split like all the others. The flavour and texture was great, if slightly thinner than other methods.

20130108-201907.jpg

20130108-203335.jpg

Method 5 (Robuchon and Ramsay) – This is a real work out, making the sabayon then beating in the butter gives you 10-15 minutes of whisk work. The result is very impressive, it appears much thicker than the other methods, a distinct mayonnaise consistency, but the actual mouthfeel is much lighter, due in part to the amount of air you’ve incorporated. For dipping this would be the perfect sauce, but it certainly won’t pour well.

20130108-202024.jpg
The sabayon thickens nicely

20130108-202039.jpg

Conclusion
There are several ways of approaching a hollandaise, but understanding some of the underlying science helps take away the fear. If you know what temperature you’re looking for the chances of it splitting are very slim. As to the exact method – if you’ve got the time and you want the absolute best, the Modernist Cuisine version is excellent. It has the best texture and flavour by some margin. If you just want something for a quick meal? Method 3 is incredibly simple, creates almost no washing up and works beautifully everytime.

Rob’s Instant Hollandaise

Ingredients
2 Large Egg Yolks
125g Butter
1 dessertspoon White Wine Vinegar
1 dessertspoon Lemon Juice
Pinch of Salt and Pepper

Method

  1. Place all the ingredients in a small pan over a low heat and being whisking.
  2. When the sauce reaches a relatively thick consistency simply take it off the heat and keep stirring for a few minutes as it cools. (If you have a thermometer, you want to stop cooking it before it reaches 65ºC)
  3. That’s it!

Whichever method you go for, grab some asparagus, poached eggs or smoked salmon (preferably all three) and whip up a batch of delicious buttery sauce to go over it. Bon appetit!

Monica’s Kitchen

Home chefs vary wildly in skill and experience – from people cowed by the prospect of poaching an egg, to those merrily spherifying using calcium alginate (modernist jargon for making natty gel balls from a liquid). Few cookbooks really try and bridge the gap – providing simple recipes that can be done by anyone, including children, to more complex dishes that will ‘wow’ your friends. Monica’s Kitchen is one of that rare group.

20121028-130647.jpg

Monica Galleti is perhaps best known for her role in Masterchef, ruthlessly vetting candidates before they cook for her boss, Michel Roux Jr. She is an accomplished chef in her own right, a Senior Sous Chef at Le Gavroche, and her first cookbook draws on her experiences of her childhood in Samoa, as a working mother and of Michelin starred cooking.

Split into several sections based on a theme suchs as ‘A time for Friends’, the recipes are nicely set out and easy to follow. Measurements are sensibly metric and unfamiliar techniques are explained, some with accompanying photos. Ingredients are, on the whole, standard, but they do occasionally require a little tracking down (e.g. Pink Pralines and Pistachio Paste). I’ve tried out a number of the recipes and met with great success – easily my favourite is this:

    Millefeuille of Chilli Chocolate with Raspberries and Pistachio Ice Cream

Ingredients – Makes Six

Pastry Sheets
3 filo pastry sheets
70g butter, melted and heated until nutty brown (beurre noisette)
50g icing sugar

Chocolate Mousse Filling
240g good-quality dark chocolate (70% cocoa solids) in pieces – I used Valrhona Guanaja
50g caster sugar
50ml water
2 medium egg yolks
350ml whipping cream
2 tsp chilli powder

Caramel Sauce
100g caster sugar
200ml double cream
1 tbsp salted butter

To Assemble
230g raspberries, halved lengthways if large
15g pink pralines, lightly crushed (available online)
15g pistachio nuts (unsalted)
6 scoops of pistachio ice cream (recipe provided in the book)
Icing sugar for dusting
Pinch of chilli powder

Method
For the mousse filling, melt the chocolate in a bowl over a pan of gently simmering water, then take off the heat and let cool slightly. Dissolve the sugar in the water in a small pan over a medium heat, bring to the boil and let boil for 1 minute. Meanwhile, whisk the egg yolks in a large bowl and then gently pour in the boiled sugar syrup in a thin stream, whisking continuously as you do so. Continue whisking for 3-4 minutes or until thick and mousse-like. Carefully fold into the melted chocolate.

In another bowl, whisk the cream with the chilli powder to soft peaks and then gently fold through the chocolate mixture. Cover and place in the fridge for about 5 minutes to firm up.

Heat the oven to 180ºC/Gas Mark 4. Lay one sheet of filo on your work surface and brush with butter, then sift over a dusting of icing sugar. lay another filo sheet on top and pat down firmly with your hands, then brush with butter and dust with icing sugar as before. Repeat with the third layer of filo. Using a large sharp knife, cut the pastry neatly in half lengthways and then cut each piece across into about 12 strips. (You need 3 strips per portion, but you may need extra in case of breakages.)

Line a baking sheet with baking parchment. Place the sandwiched filo strips on the tray, cover with another sheet of baking parchment and place another baking tray on top. Put a heavy weight, such as a casserole dish, on top to keep it flat. Bake for 12-15 minutes, until golden brown. Leave the filo to cool with the tray on top or the strips will curl up.

To make the caramel sauce, melt the sugar in a small saucepan over a medium heat and continue to heat until it starts to caramelise at the edges. Now stir with a spatula until all the sugar has caramelised. Remove from the heat and whisk in the cream, taking care as it can bubble up rapidly. Stir in the butter and set aside to cool.

To assemble, put the mousse into a piping bag fitted with a large plain nozzle (or you can simply scoop it if you prefer). Put a small dot of the mousse on each large serving plate and lay a strip of filo pastry on top (the mousse will stop it slipping on the plate).

Pipe a thick line of mousse along one side of the pastry. Place a line of raspberries along the middle of the pastry, then pipe another line of mousse on the other side. Place another strip of filo on top and press down lightly, then repeat the mousse and raspberry layer. Position a third piece of filo on top of the mousse and berries, pressing it down lightly.

Drizzle the caramel sauce decoratively onto the plates and sprinkle with some of the crushed pralines and pistachios. Place a scoop of pistachio ice cream on top and sprinkle with pistachios. Dust the tops of the pastries with icing sugar and a little chilli powder and serve at once.

20121028-101248.jpg
Churning pistachio ice cream

20121028-101305.jpg
The completed dish

How does it taste?
Fantastic. I love the chilli/chocolate combo and the pistachios work really well. It looks beautiful on a plate and is relatively simple to assemble between courses as all the components can be prepped in advance, it’s great for a multi-course meal and scales easily.

Conclusion

Monica’s Kitchen is a great collection of recipes – i’ve spent several weekends working through it and barely scratched the surface. I love the blend of difficulty and influence – sophisticated cooking with an exotic flair. It would be a welcome addition to any kitchen and is particularly good if you enjoy dinner parties or entertaining.

Monica’s Kitchen, RRP £20, is published by Quadrille and available in all good bookshops.

Sous Vide BBQ

Summer!

With the weather finally improving – it was definitely time to fire up the bbq. I’ve been looking forward to doing some sous vide barbecue for ages. Everyone’s suffered burnt, dry drumsticks or dangerously pink chicken thighs. Combining sous vide precision with a BBQ’s intense heat and smokiness is a great combination. With all the food below I’m cooking it until done with the sous vide, then browning it on the barbecue.

20120728-205645.jpg

To Sauce or Not To Sauce?

Sticky rich marinades are a key part of a good barbecue, but the difficulty comes in whether or not you include them in the sous vide bag. Heston Blumenthal did some research looking at how marinades soak through chicken, using an MRI to check the progress. The downside to sous vide with marinades that you risk losing some of the flavour as it will dissolve into the sauce, which may not be eaten. In the interests of research I tried both options, and the winner is? Hard to say really – very little difference. Next time out I’ll examine what happens if you marinade before sous vide.

Sausages

I love sausages – there’s something deeply satisfying about a good banger and some fluffy mash. With shop-bought sausages there’s always some concern over what pork cuts have gone into it and how well the pigs were looked after. The logical solution? Make them yourself. Sausages are surprisingly complex and to get a good texture requires you to add the correct seasonings and the right ratio of rusk/breadcrumbs. While a 100% meat sausage is a nice idea, they end up very dense with an odd mouthfeel. I used a kit from Lakeland to provide the casings and seasoning mix and then some great Blythburgh pork (a mixture of 80% shoulder and 20% belly) for the filling. They had a lovely, quite delicate flavour, the texture was great, but the casings weren’t as durable as I’d hope, a couple didn’t survive the water bath. Next time I’ll try natural hog.

72 Hour Short Ribs

Short ribs are a little unusual in the UK, but very popular in America. In England beef ribs tend to be quite stringy and aneamic – you end up with a thin layer of meet over a very long bone. Short ribs should have at least an inch of thick, flavourful meat over a small bone the size of a business card. The downside to this is that it can end up very tough – the solution? Low, slow cooking, ideally in a sous vide. Because of the huge amount of connective tissue in the meat it needs to cook for a very long time – 3 days is about the optimum.

With a degree of trepidation, I dutifully setup my sous vide, carefully sealed the top to stop evaporation losses and cooked away for three days before coating them in barbecue sauce and blitzing them on a red hot barbecue – the result? Amazing. The texture was incredibly soft, almost mousse like. The meat fell off the bone, leaving it completely clean. The slow cooking brought out the mineral flavour of the meat. Next time out I’ll ease off the seasonings and add something to bring out the sweetness of the meat.

Burgers

I’ve done burgers twice so far on this blog, so I won’t go into a lot of detail, apart from mentioning the mix that I used: 50% Sirloin, 25% Chuck, 25% Brisket. Very similar to the peerless ShakeShack burger and Heston’s own recipe. It created a much beefier flavour than my previous attempts, though the burgers were very fragile, I need to wrap them tighter next time.

Peri Peri Chicken
Surprisingly the star of the show – chicken works so well in sous vide and the tenderness and moisture is completely unexpected in a BBQ. The thighs worked much better than I expected and the meat delicately flavoured, the marinade worked well, but I’ve definitely seen it go further in.